Download Accelerator in Linux and Windows

I find opensource download manager that can daplikasikan in all types of operating systems that use the Mozilla Firefox browser, I try the application on Linux and Windows, that can run smoothly. Download Them All


Add a program on Mozilla Firefox which can be applied in all OS. The file is quite small-about 500 KB.

Installation

Step is very simple:

1. Go to site DownloadThemAll
2. Click Add To Firefoxaddon

addon
3. Then you restart Firefox

If in step-2, could not be done means that you do not support Firefox to install this Add On. Possible old version of firefox.

For the windows solution:

1. Uninstall Firefox
2. Download the latest Firefox
3. Install the new Firefox download
4. Repeat the above installation DownloadThemAll

For the Ubuntu Linux is actually the same in Windows, but of course different command.

1. Uninstall Firefox, use the command:
sudo apt-get uninstall firefox
2. Download the latest Firefox select the Linux OS
3. Extract the file with right click -> Here Extact
4. Then we copy the file to ektrak /usr/lib with the following steps,
5. firefox right-click the folder -> copy
6. Alt and press F2 at the same time for running the program mengeluar
Type:
gksudo nautilus /usr/lib
and enter the admin password is
right click -> paste

start


7. The next step is to make the icons start the program, the following manner:
Right-click on the start menu -> select edit menus

start


select applications -> internet -> and click on the new Item

menu


menu

Type the name Mozilla Firefox, type in the command /usr/lib/firefox/firefox
To change the icon, click the icon -> and enter /usr/lib/firefox/icons, select the icon for the desired ago ok
After I finished Strat menu click ok


8. To menjalakan firefox click start -> Internet -> Mozilla Firefox
9. Repeat the above installation DownloadThemAll
10. Restart your firefox

How to Use

To use, you use more easily DownloadThemAll with the Manager of ways:

In Mozilla Firefox click Tools -> DownThemAll! Tools -> Manager

The result:

download


download


Clear Squid Directory

>>>> Just delete the cache directory and its log is:)
>> The mananya ya mas? at all because I mudeng. :)
> I usually in /var/spool/squid ...

Usually I do to minimize downtime
1. squid stop
# /etc/init.d/squid3 stop

2. rename the cache directory
# mv / var/spool/squid3 / var/spool/squid3.BAK

3. create a new directory for the cache
# mkdir / var/spool/squid3

4. Change owner
# chown proxy.proxy / var/spool/squid3

5. Turn on more squid
# /etc/init.d/squid3 start

6. Nah .. new delete the old cache directory
#rm -rf /var/spool/squid3.bak

What if the first delete the directory, the old .. The contents of the directory
is so big, so I delete
recursif the old files.

Site Map

Make Personal Website with Wordpress
Driver Toshiba Portege 4010
Simple Step to Make Joomla Website
Bad check sum (CMOS) on Toshiba
How to refill catridge canon (830, 831,40,41)
Zyrex D4F Driver
Sharing printer with CUPS and Samba
Combine Two Internet Provider with Mikrotik Router...
Install Flash Player 10.0 in Ubuntu 8.04
Driver Epson Stylus C45
Dell Latitude C610 Configuration Diagnostic

Make Personal Website with Wordpress

1. Buy paid hosting 

Hosting paying more secure, because we do not worry we are hosting hosting removed by the host master. Now hosting is very cheap even from $5 , - per year. 

2. Login to cPanel 
After we list our domain hosting, we will get a username and password from cPanel. To login type www.yourdomain.com / CPANEL in the browser address bar, enter the username and password. 

3. Use Fantastico 
In CPANEL, there are already programs to install the CMS (Content Management System) with Fantastico. Click Fantastico, and then click search wordpress install, we are prompted to enter the same username password to log in to do us. 

4. How WordPress Login 
After the install is complete, to login to wordpress type www.yourdomain.com/wp-admin, after that we enter the username and password wordpress (remember different username with the password wordpress CPANEL). 

5. Posting on WordPress 
To start posting click Posts, and Add New, type in our article and click Publish.

Driver Toshiba Portege 4010

Series :
- Toshiba Portege 4010

Problem:
- Not detect hardware sound, vga, wireless driver, modem

Solution :
- Download driver in this link http://eu.computers.toshiba-europe.com …

Solution detail :

Download driver link:
http://eu.computers.toshiba-europe.com …

Portégé 4010 PIII-M 933 MHz/XP…


Switch model::

Portégé 4010 PIII-M 933 MHz/XP…
Part Number : PP401E-1FCDF-G3 
Key Features
- Ultra-portability without compromise- Fully integrated wireless communication capability for ultimate mobile freedom- Innovative and eye-catching design creates a memorable impression- Long battery life for maximum independence- Enhanced expansion options guarantee greater compatibility

Simple Step to Make Joomla Website


1. Download joomla, from joomla.org 

joomla is a CMS that allows you to create a website, after installing joomla in your hosting, then the withdrawal will be working joomla blog. Later we consider the steps. 

2. Download filezilla 

FTP-based program will be easier for you to transfer data from your computer to your hosting server. You can download the filezilla-project.org. then install on your computer. 

3. Sign up and get your hosting 

Submit your hosting to hosting with the commercial register eg (www.kerajaanweb.com) or you can register on the free hosting, for example phpnet.us after that you will get: 
- Address of your domain: eg yourdomain.com or yourdomain.phpnet.us 
- Username and password CPANEL 
- Mysql host 
- Mysql password 
- Ftp server
- ftp username dan password 

3. Upload-joomla is the master data with the program to filezilla server hosting your 

ftp server and enter your username and password
upload joomla master program to server

4. CPanel and open and ekstract joomla 

enter to the CPANEL write the address in the browser address bar eg http://yourdomain.com/cpanel, then enter CPANEL username and password, and you will goto filemanager and ekstract joomla 

5. Install joomla 

To install joomla on your server, goto your address in your browser, eg yourdomain.com, during the install we will be asked to enter our Website Title mysql host, mysql username, password mysql, ftp server, ftp ftp username and password. joomla your password 

6. Delete installation folder joomla 

Re-entry to the CPANEL hosting as in the no 4, delete the folder installation 

7. Log in to joomla 

Go to joomla type in the browser eg www.yourdomain.com/administrator, enter your joomla admin username and password 

8. start posting 

poting click to start the new article in joomla

Bad check sum (CMOS) on Toshiba


Series: 
- Toshiba Portege 4010 

Problems: 
- A message appears 
*** Bad check sum (CMOS) *** 
Check system. Then press [F1] key. 
every computer switched on 
- Capslock key, Ctrl, F1 not working 

Damage diagnosis: 
- CMOS battery run out, the keyboard is blocking so that the bios can not be fixed unless the service center of Toshiba 


Solutions: 
- Replace CMOS battery 
- Use external keyboard to setup BIOS 

Solution Details: 
I found the problem laptop Toshiba Portage 1040 a message appears: 

*** Bad check sum (CMOS) *** 
Check system. Then press [F1] key. 

When I press F1 in accordance with the instructions, the laptop does not respond. And that message appears continuously every laptop switched on. 
These messages appear because the CMOS battery run out to damage to laptop or laptop not switched on for a long time. 
At first I check the mainboard, if any hardware that does not connect, but does not respond in any way. 

The solution is to use the external keyboard. After I check several forum discussion I try the following steps, and was successful. I try this in the Toshiba Portage 1040 laptop, but can be done in other types of Toshiba laptops as well. Here are the steps: 

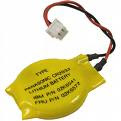
1. Loading your laptop, change the CMOS battery, connect the positive and negative battery with soldering iron, the red cable on the positive and negative in the black cable. The CMOS battery you can get in the shops or computer accessories. 

     
Tutorial how to open a laptop Toshiba Portage 1040 you can follow through this link: 
http://www.irisvista.com/tech/laptops/Toshiba4010/portege4010_1.htm 
To change CMOS battery, you can just follow up to STEP 14 

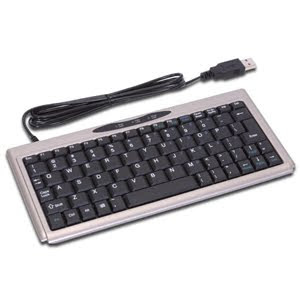
2. Connect your laptop back, attach a USB external keyboard, because the keyboard does not work with Toshiba. 

3. At the time the error message appears 
*** Bad check sum (CMOS) *** 
Check system. Then press [F1] key. 
press F1 through external keyboard, change the system date and time, follow the instructions of edits at the bottom of the screen. Arrow to move the variable you want to change, to change the space variables. PgDown and PgUp to move the page. If you are finished press End and Y to save. 

4. The computer will restart and go directly to your OS. 

5. After entry into the OS that some of the keyboard keys do not work as F1, Ctrl, Capslock, to address them in the windows os, we can use the keyboard on the screen in Start -> All Programs -> Accessories -> Accessibility -> On-Srcreen Keyboard. 
Because the on screen keyboard is really we need to turn off capslock key, we can put it in the start-up windows to fit the way a flame directly.

How to refill catridge canon (830, 831,40,41)

I use my Canon Ip1880, cartridge Black Color number 830 and number 831. For the Black certainly does not have difficulty recognizing hole and not be wrong because only 1 color of ink, but for the Color musti we care as a needle to the color of the floatation tank is a little hard to color because it is not treated in accordance with the place. 


The following guide content (needle) color ink cartridge for the number 831, it is the same with the Canon cartridge number 41 


Guide needle Ink Canon 41 / 831 

Usually after refill color still has not come out perfect, no worries. Clean aja. Perhaps perluperlu several times, I even the 5 - 6 times, and once deep cleaning. Exhausted with the perfect color out more.

Zyrex D4F Driver


Series: 
- Zyrex D4F 

Problems: 
- VGA drivers and the sound is not detected Windows XP 

Solutions: 
- Download VGA driver 
http://download.cnet.com/SiS-661FX/3000-2108_4-67429.htm 
- Download Sound driver 
http://download.cnet.com/WDM-A397-zip/3000-2110_4-139278.html 

I try to install Windows XP on the laptop with the code behind Zyrex D4F / D40EF. After the install finished, was not yet support VGA and Soundnya. 

Initially I use Aida32 to detect Hardwarenya. Aida was detected in 32 Sis 661FX chipset seriesnya, Sis 6330 VGA, Sound Sis 7012, but not in the internet search does not find me. 

After I try, I can finally install the drivers and the computer running smoothly. 

Drivers that I use is: 

VGA SIS 661FX 

Download link: http://download.cnet.com/SiS-661FX/3000-2108_4-67429.html 

Sound Realtek AC'97 
Download link: http://download.cnet.com/WDM-A397-zip/3000-2110_4-139278.html

Sharing printer with CUPS and Samba

I know this will sound like a repost, but the information provided as either gone over my head or not worked. Any help or dumbing down would be useful.

I am unsuccessful in printing from a WinXP machine to a HP DesignJet 650c shared by Ubuntu. I am able to print from the Ubuntu machine perfectly fine. I can see the printer on my network when browsing from the WinXP machine. I can connect to the printer from the WinXP machine. However the drivers are not found. If I choose to load the printer with the local windows drivers and try to print a test page, the printer goes through the motions, but no ink is put to paper.

I know the windows machine needs to be using a postscript print driver, but do not know how to implement that.

SYSTEM SETUP
*Ubuntu Dapper Drake
*System is authenticating against a ClarkConnect (Linux) server setup as the PDC (Win NT style) - Used the following guide to accomplish this (thanks vizvayu) http://ubuntuforums.org/showthread.php?t=5409

PRINTER ON SYSTEM
HP DesignJet 650c was setup using CUPS (localhost:631)

1) Added cupsys To shadow
Code:
# sudo adduser cupsys shadow

2) Added printer named “plotter” on LPT#1 using “djns” driver through CUPS web admin.

3) Removed cupsys From shadow
Code:
# sudo deluser cupsys shadow

4) Edited /etc/cups/cups.d/ports.conf to read
Code:
Listen *:631
Listen /var/run/cups/cups.sock

5) Changed Ubuntu’s default /etc/samba/smb.conf to read
Code:
[global]
  workgroup = MYNETWORK
  netbios name = %h
  server string = %h server (Samba, Ubuntu)
  wins support = no
  wins server = 192.168.1.228
  password server = *
  dns proxy = no
  log file = /var/log/samba/log.%m
  max log size = 1000
  syslog = 0
  panic action = /usr/share/samba/panic-action %d
  security = domain
  encrypt passwords = true
  passdb backend = tdbsam
  obey pam restrictions = yes
  invalid users = root
  passwd program = /usr/bin/passwd %u
  passwd chat = *EntersnewsUNIXspassword:* %nn *RetypesnewsUNIXspassword:* %nn *passwordsupdatedssuccessfully* .

  load printers = yes
  printing = cups
  printcap name = cups
  printer admin = @lpadmin

  socket options = TCP_NODELAY
  idmap uid = 10000-20000
  idmap gid = 10000-20000
  template shell = /bin/bash
  template homedir = /home/%D/%U
  winbind enum users = yes
  winbind enum groups = yes
  winbind cache time = 10
  winbind separator = +
  winbind use default domain = yes

[printers]
  comment = All Printers
  browseable = yes
  path = /tmp
  printable = yes
  public = yes
  writable = no
  create mode = 0700

[print$]
  comment = Printer Drivers
  path = /var/lib/samba/printers
  browseable = yes
  read only = yes
  guest ok = yes
  public = yes

6) Downloaded from cups-windows-6.0-source.tar.gz and placed contents into /var/lib/samba/printers
Code:
# wget http://www.cups.org/windows/software.php?6.0
# tar -zxvf cups-windows-6.0-source.tar.gz
# cd cups-windows-6.0/i386
# cp cups* /var/lib/samba/printers/
# cp cups* /var/lib/samba/printers/W32X86
# cp cups* /var/lib/samba/printers/WIN40

7) Restarted services
Code:
# sudo /etc/init.d/samba restart
# sudo /etc/init.d/cupsys restart

Combine Two Internet Provider with Mikrotik Router OS

 I'm trying to combine 2 provider line  with Mikrotik, this technique usually called Load Balancing, Mikrotik, namely the ability to search online for the free internet connection. Thus, the computer will find a number of friends that are not busy for the internet connection. If we use the Download manager, download accelerator or speed of the download to 2 times 200 KB / s, intelligent update download Symantec update about 2 minutes. 

1. At first I Istall Mikrotik PC PIII / 128 Ram / 10 G HD 

2. Then I create a computer network configuration, this


Line 2 with the internet provider, 2 ADSL modems, a PC and with Mikrotik proxy squid Ubuntu Server 8:04 

3. Then I configure the mikrotik like this: 

/ ip address 
add address = 192.168.2.2/24 network = 192.168.2.0 broadcast = 192.168.2.255 interface = lan comment = "" disabled = no 
add address = 192.168.3.2/24 network = 192.168.3.0 broadcast = 192.168.3.255 interface = speedy1 comment = "" disabled = no 
add address = 192.168.4.2/24 network = 192.168.4.0 broadcast = 192.168.4.255 interface = speedy2 comment = "" disabled = no 

/ ip firewall mangle 
add chain = prerouting in-interface = lan connection-state = new Nth = 1,2,0 action = mark-connection new-connection-mark = one passthrough = yes comment = "" disabled = no 
add chain = prerouting in-interface = lan connection-mark = one action = mark-routing new-routing-mark = one passthrough = no comment = "" disabled = no 
add chain = prerouting in-interface = lan connection-state = new Nth = 1,2,1 action = mark-connection new-connection-mark = two passthrough = yes comment = "" disabled = no 
add chain = prerouting in-interface = lan connection-mark = two action = mark-routing new-routing-mark = two passthrough = no comment = "" disabled = no 

/ ip firewall nat 
add chain = srcnat connection-mark = one action = src-nat to-addresses = 192.168.2.3 to-ports = 0-65535 comment = "" disabled = no 
add chain = srcnat connection-mark = two action = src-nat to-addresses = 192.168.2.4 to-ports = 0-65535 comment = "" disabled = no 

/ ip route 
add dst-address = 0.0.0.0 / 0 gateway = 192.168.3.1 scope = 255 target-scope = 10 routing-mark = one comment = "" disabled = no 
add dst-address = 0.0.0.0 / 0 gateway = 192.168.4.1 scope = 255 target-scope = 10 routing-mark = two comment = "" disabled = no 
add dst-address = 0.0.0.0 / 0 gateway = 192.168.4.1 scope = 255 target-scope = 10 comment = "" disabled = no 

Connection is success and the speed of access multiply more fast

Install Flash Player 10.0 in Ubuntu 8.04


You want .... The Internet webrowser firefox or my latest version ... may be that we have in mind when we need to upset what we do .... install a flash plugin that are on the website because I can show the latest version flashnya .... 

how installnya ago? go ahead with our install, yuk! 

1. First way 

Prepare the intalation: 

Download file flash_player_10_linux.deb 

Installation process: 
Install Flash plugin to use the terminal

$ sudo dpkg -i install_flash_player_10_linux.deb 
Then reload your firefox .... 

2. Second way 
If youtube not appear,  remove plugin with the command: 

$ sudo apt-get install flashplugin-nonfree 
If the terminal use the command 

$ sudo dpkg-configure-a 
Reload your firefox ... 

3. Still can not show, use this way .... 
For this command .... 

$ wget http://abikuchat.110mb.com/datashare/flash10_en.sh 

$ sudo chmod + x flash10_en.sh 

$ sudo ./flash10_en.sh 
Reload your firefox ... .. 

4. 4th ways 
If still not show, you firefox maybe damage, remove firefox from the computer. Then download firefox 
Command: 

$ sudo apt-get remove firefox 
$ sudo apt-get remove firefox-3.0 

Download Mozilla Firefox here ... 

Then extract the downloaded files with a right click -> Extract Here 
Download Flash Player here .... select the type. tar.gz for Linux 
Extract the files it, copy and paste the libflashplayer.so http://profabiku.multiply.com/firefox/plugins/ 

Run the file with firefox http://profabiku.multiply.com/firefox/firefox 


Results installation was successful ....!

Driver Epson Stylus C45

This is the download link:

http://www.epson.com.ph/epson/drivers/driver_download.htm?dc=1&mode=3&m=false&catid=1&pid=261

Dell Latitude C610 Configuration Diagnostic

Series:

  • Dell Latitude C610

Problems:

  • Configuration Diagnostic appear on Each Computer
  • Keyboard is broken, the leakage flow
  • Data lost on the keyboard PCB
Diagnosis of damage:
  • Keyboard is broken / konsleting
  • There seadistust Diagnostic, because the laptop going normalan hardware (on keyboard)
Solutions:

  • Given the bulkhead Keybord mica that is not in contact with body laptop
  • Connecting the disconnected keyboard ditebalkan with 2B pencil, and go through the content of the small fiber cable

  • Handling Details:

    I handle a laptop DELL Latitude C610 Series is an error when booting. Laptops are always into the configuration selected diagnostic and the computer will perform a series of diagnostic harware. On the screen there are any posts in the ESC to Cancel, but when the ESC key stuck computer to keep the process and the process can not be stopped. I try to disassemble a laptop, tighten its hardware-hardware, but the laptop still running the same configuration Diagnostic. I found the solution when I lift keyboardnya, and the keyboard does not come into contact with body laptop, the computer can run normally. After I check, the damage occurred on the keyboard. Keyboard error if body metal keyboard with laptop body. The solution I use mica thin plastic screen to prevent contact between the body with the laptop keyboard. Cut accordance with the size of the basic platform with the keyboard body. computer and can work normally.

    However, there was a problem again. When I fix a keyboard key (space), were damaged, cushion rubber keypad and exfoliate track lost the key so that there are some who died. At first I try with a hot tin solder, but even erase lines keypad. Finally I found the solution with a pencil. In fact the tip of the pencil / graphite is a kind of conductor, and I reinforce the keypad with pencil lines, assisted with a small snippet of fiber cable routes can be saved again. Rubber that has been damaged I take from the keypad that is used rarely Pause Break to replace the damaged keypad space. To paste the rubber, I use glue versatile (Alteco).